Friday, November 15, 2024

Rainbow Birthday Celebration!

Welcome class!
It's another Saturday installment of Crafty Meraki goodness!  Did you have a chance to check out their new release this week?  My card today is not a part of that new release but it's a creative use of some of their older products.  The theme for the week is celebrations, and with a 16th birthday that happened this week, I used the opportunity to make a birthday card for my niece!  The gift boxes are from the Spruce Up Layering Tree die set...those presents can be other places than under a tree!  I got to work with my Pinkfresh ink cubes and made a rainbow of the presents as I cut them all out of white cardstock and got blending. I went glam and use some of my holographic cardstock for the bows and placed it all on some Oh So Black Cardstock from Simon Says Stamp.  For the sentiment, I reached for my Gilded Greetings stamps from Crafty Meraki, which are super convenient--you can cut SOOOOOO many sentiments at one time!  I grabbed the Happy Birthday sentiment and placed it on a vellum circle.  A few sequins later and we have a card!


So here's the lesson plan:
1.  Head to the Crafty Meraki blog to see the creation of the card :)

Product Line Up:
The above products can be found HERE, which is an affiliate link to the Crafty Meraki shop.  Affiliate links just help me fund this hobby at no additional cost to you and create more lesson plans and creativity for all of you--I appreciate your support! 

Class dismissed!

Wednesday, November 13, 2024

Thanks and Gratitude

Welcome class!
I love love love how this card turned out and I'm happy to be sharing it with you.  One of my favorite things to do when designing cards for Simon Says Stamp is to combine products from many different releases, which is what I did here! I also made sure to include several little techniques that I see designers use all the time but never think to include myself that really made this card pop.


So here's the lesson plan:
1.  Pick your colors.  I went with the Blue Lagoon Pawsitively Saturated Ink Cubes, and wanted to complement them with the Purple Fields set as well.
2.  Emboss the things!  I embossed the Thank You text background with clear embossing powder using the VersaFine Nocturne ink.  Stencil the things!  I used Picket Fence Studios Pint Sized Paper Pouncers to stencil the Stems and Leaves on top of the embossed background.  Die cut the things!  I cut out several blooms from the Aurora Blooms die set from white cardstock and ink blended on top.  I also ink blended on top of the thanks sentiment in a gradient of green.
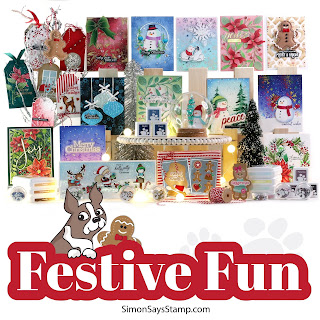
3.  Assemble!  I tore a strip off of the right edge of the stenciled layer and cut off half of the front of the card base so that there was a torn edge on the front of the card but a full size base.  I also used Copic markers to add accents to my ink blended die cuts.  The only piece of the Festive Fun release that I used her was the gratitude sentiment strip!  

Monday, November 11, 2024

Let it Snow! Let it Snow! Let it Snow!

Welcome class!
I'm here with another card featuring the adorable Oliver the Snowman die from Simon Says Stamp's Festive Fun release!  I can't get enough of using it, and I'm so glad he's got a papa Snowman in Arthur the Snowman....he needs to come to live in my craft space too!

So here's the lesson plan:
1.  Pick your colors. I went with a blend of the inks from the Pawsitively Saturated Ink set Blue Seas for the background, and cool greens and purples for the accent colors.
2.  Blend the things!  I blended the plain white panel that served as the base with the Blue Seas inks.  Hot foil the things!  I used my Royal Sovereign laminator with the Falling Snowflakes Acetate Foil Transfer Sheets. I had it super hot, then used some Deco Foil in Silver. Die cut the things!  I cut out Oliver, as well as the Thin Frames in Black, along with the rolling hills.
3.  Assemble!  Glue the frame on top of the acetate snowflakes.  Place the cut sentiments from the Reverse Sentiments Winter pack on top of the acetate.  Glue the acetate down to the blended layer putting the glue where the sentiments are foam taped onto the panel. Place the rolling hills (one glued to the panel, the other popped up with foam tape).  Later I went back and added some glitter strips to the bottom of the hill because it looked too plain to me.  Assemble Oliver and tuck him in the hills.  Add a few white gel pen accents because you just can't help yourself--LOL!

 Product Line Up:

Class dismissed! 

Sunday, November 10, 2024

Oliver the Frosty Snowman!

Welcome class!
I'm here with a card using products from Simon Says Stamp and the new Festive Fun release that went live this week!  I am featuring the new Oliver the Snowman die with a rainbow of hats and scarves to wish happy holidays in a snowball background.  Let's get to it!


So here's the lesson plan:
1.  Pick your colors.  I went with my good friend Roy G. Biv here and had a rainbow theme, with some white glitter paper in the background to give sparkly new snowfall vibes.
2.  Die cut the things.  Gotta admit I used a lot of scraps to get these snowmen ready to go.  I also used white glitter paper cut out in different sized circles for the background.
3.  Assemble!  I put some white gel pen accents on the hats and scarves for detail, and used a sentiment from the Winter Reverse Sentiment pack.  This one was easy peasy, but looks super cute!


 Product Line Up:

The above links are affiliate links, which just helps me fund this hobby at no additional cost to you and create more lesson plans and creativity for all of you--I appreciate your support!

Class dismissed!

Saturday, November 9, 2024

Get Creative With Your Dies!

Welcome class!
I'm here with another card as the guest designer for Crafty Meraki this month.  The challenge for the week was to use stamps, which had me in a bit of a pickle because I only have sentiment stamps.  So I put my thinking cap on and found some old craft foam in a drawer and made my own stamps using the Merry Tag die set and that big chunky Merry die....which made a perfect stamp!  It turned out all graphic and grunge, which is just the vibe I was going for.  A simple gold sentiment with a coordinating burgundy Christmas for contrast and we have another card for the Christmas stash. 


So here's the lesson plan:
1.  Head to the Crafty Meraki blog to see the entire step by step creation of the card :)

Product Line Up:
  • Crafty Meraki Spruce Up Layered Tree Die
  • Crafty Meraki Jolly Holly Hot Foil Plate
  • Crafty Meraki EAP--Gilded Holiday Greetings
  • Crafty Meraki Gilded Holiday Greetings Coordinating Die
  • Crafty Meraki Sparkle Red Rhinestones
The above products can be found HERE, which is an affiliate link to the Crafty Meraki shop.  Affiliate links just help me fund this hobby at no additional cost to you and create more lesson plans and creativity for all of you--I appreciate your support! 

Class dismissed!


Saturday, November 2, 2024

Gilded Happy Holidays

Welcome class!
I'm happy to be joining the Crafty Meraki team for the month to share some inspiration with you!  I don't know about you, but I like to get a head start on my holiday cards and not be panicking at the last minute to send them all out.  I've made the bulk of my cards for this year already over the summer, but I saved a batch to make for my guest spot this month!


So here's the lesson plan:
1.  Head to the Crafty Meraki blog to see the entire step by step creation of the card :)

Product Line Up:
  • Crafty Meraki Spruce Up Layered Tree Die
  • Crafty Meraki Jolly Holly Hot Foil Plate
  • Crafty Meraki EAP--Gilded Holiday Greetings
  • Crafty Meraki Gilded Holiday Greetings Coordinating Die
  • Crafty Meraki Sparkle Red Rhinestones
The above products can be found HERE, which is an affiliate link to the Crafty Meraki shop.  Affiliate links just help me fund this hobby at no additional cost to you and create more lesson plans and creativity for all of you--I appreciate your support!