Sunday, December 1, 2024

It's DieCember! Time to Spread Christmas Joy!

Welcome class!
I don't know about you, but I can never have enough craft dies....they are the most versatile products in my stash!  Simon Says Stamp for the win--welcome to DieCember!  Simon is releasing a wide variety of craft dies today that meet all of your card making needs for an assortment of projects you may be working on with Christmas only a few short weeks away--card making, gift card holders, and more.  I think I used at least 4 different die sets for this cute little bird card I'm featuring today as a part of the DieCember party, which features a huge assortment of Simon designers who craft in a variety of amazing styles to give you a TON of inspiration.  Check out the Simon Says Stamp blog for the line up for today's party!  Let's get to the details on this card!


To celebrate DieCember, Simon has a great free gift with any $100 purchase of DieCember release products....there are sooo many more fun products where this little birdie came from (the EZ strips are one of my personal favs!), so swing by their website HERE to check it out! 

So here's the lesson plan:
1.  Pick your colors. I wanted to this to have a holiday theme, so I went with the go to of red and green. 
2.  Die cut the things!  I used the new Rustic Nest wafer dies, as well as the new Jolly Birdie wafer dies, and supplemented with the Stocking Cat wafer die for the Santa hat and the Elegant Blossom Branch wafer die for the branch it's all sitting on. Ink blend the things!  I cut the nest, bird and package out of colored cardstock--the lightest shade--and went back over with some Pawsitively Saturated Inks to blend them to a shade that I was hoping for.  The leaves on the tree and the bird wings are examples of how I started out with a light color cardstock (I believe I used Concord and 9th's Sprout) and blended to get the shading I wanted. 
3.  Assemble!  This 'lil bird has a gift box in the nest with it--using the Gift Builders wafer die set--which I grabbed some Simon glitter paper to make a sparkly bow. I mounted the whole bird set up on an ink blended circle die. A sentiment from the CZ Reverse Typed Christmas Sentiments pack and some Starshine embellishments and we have a card!


Saturday, November 30, 2024

Attitude of Gratitude

It's my last week at the guest designer with Crafty Meraki, and the theme for this week was Thank You.  I'm a pro at thank you notes as they seem to be the  most frequently produced in my craft room.  I wanted to stray a bit from the holiday theme that I've been working with the past few weeks and I made a card with an earthy color palette to wrap up the month, featuring a fun technique to stretch my supplies--I dry embossed with a hot foil plate!


So here's the lesson plan:

1.  Head to the Crafty Meraki blog to see the creation of the card :)

Product Line Up:
  • Crafty Meraki June Meraki Floral Dies
  • Crafty Meraki Marrakech Hot Foil Plate
  • Crafty Meraki Gilded Greetings Stamps
  • Crafty Meraki Gilded Greetings Die
The above products can be found HERE, which is an affiliate link to the Crafty Meraki shop.  Affiliate links just help me fund this hobby at no additional cost to you and create more lesson plans and creativity for all of you--I appreciate your support! 

Class dismissed!

Saturday, November 23, 2024

Two for One Christmas Tags!

Welcome class!
I'm here with another project for Crafty Meraki!  This week's theme was tags, and I had a great idea to use their Merry Slimline Tag dies along with their EAP Festive Floral Wreath suite of products to make the first of my holiday tags.  Their EAP products make things so simple!  I'm looking forward to making some of my Christmas cards next year using some of these products.

So here's the lesson plan:

1.  Head to the Crafty Meraki blog to see the creation of the card :)

Product Line Up:
  • Crafty Meraki EAP Festive Flora Wreath Paper
  • Crafty Meraki EAP Festive Flora Coordinating Die
  • Crafty Meraki Merry Slimline Tag Die
The above products can be found HERE, which is an affiliate link to the Crafty Meraki shop.  Affiliate links just help me fund this hobby at no additional cost to you and create more lesson plans and creativity for all of you--I appreciate your support! 

Class dismissed!

Friday, November 22, 2024

Lil' Foxy Christmas

Welcome class!  
Happy Friday!  Today's card is a simple watercolor card using Karin markers as well as the Snow Buddies stamp set from the Festive Fun release at Simon Says Stamp! I'm not a watercolorer, but I'm enjoying having the chance to play with my Karin markers with these images and trying out a few different techniques.  A little stenciling in the background helps to give the dimension I wanted for this card. Let's get to it!


So here's the lesson plan:
1.  Pick your colors.  I'm using some Tim Holtz Watercolor paper with this, mounted on some black cardstock with a white base.  That image needs to do the coloring.
2.  Color the things!  I scribbled my markers on top of my glass mat and used a wet brush to give basic color to the image, then I went back with the marker directly to the paper with the wet brush to spread the ink around.  On the package, I colored the entire thing light green, and then just colored the stripes with a dark green marker.  I used a pale blue to provide some shading to the base in the snow.  Stencil the things!  I used some white texture paste from Michaels with the Falling Snow stencil on the top of the panel. Emboss the things!  White emboss a sentiment from the Snow Buddies on black cardstock. 
3.  Assemble!  Add some Starshine embellishments, tie the sentiment on with natural twine and it's a card!


Product Line Up:

Class dismissed! 
 

Wednesday, November 20, 2024

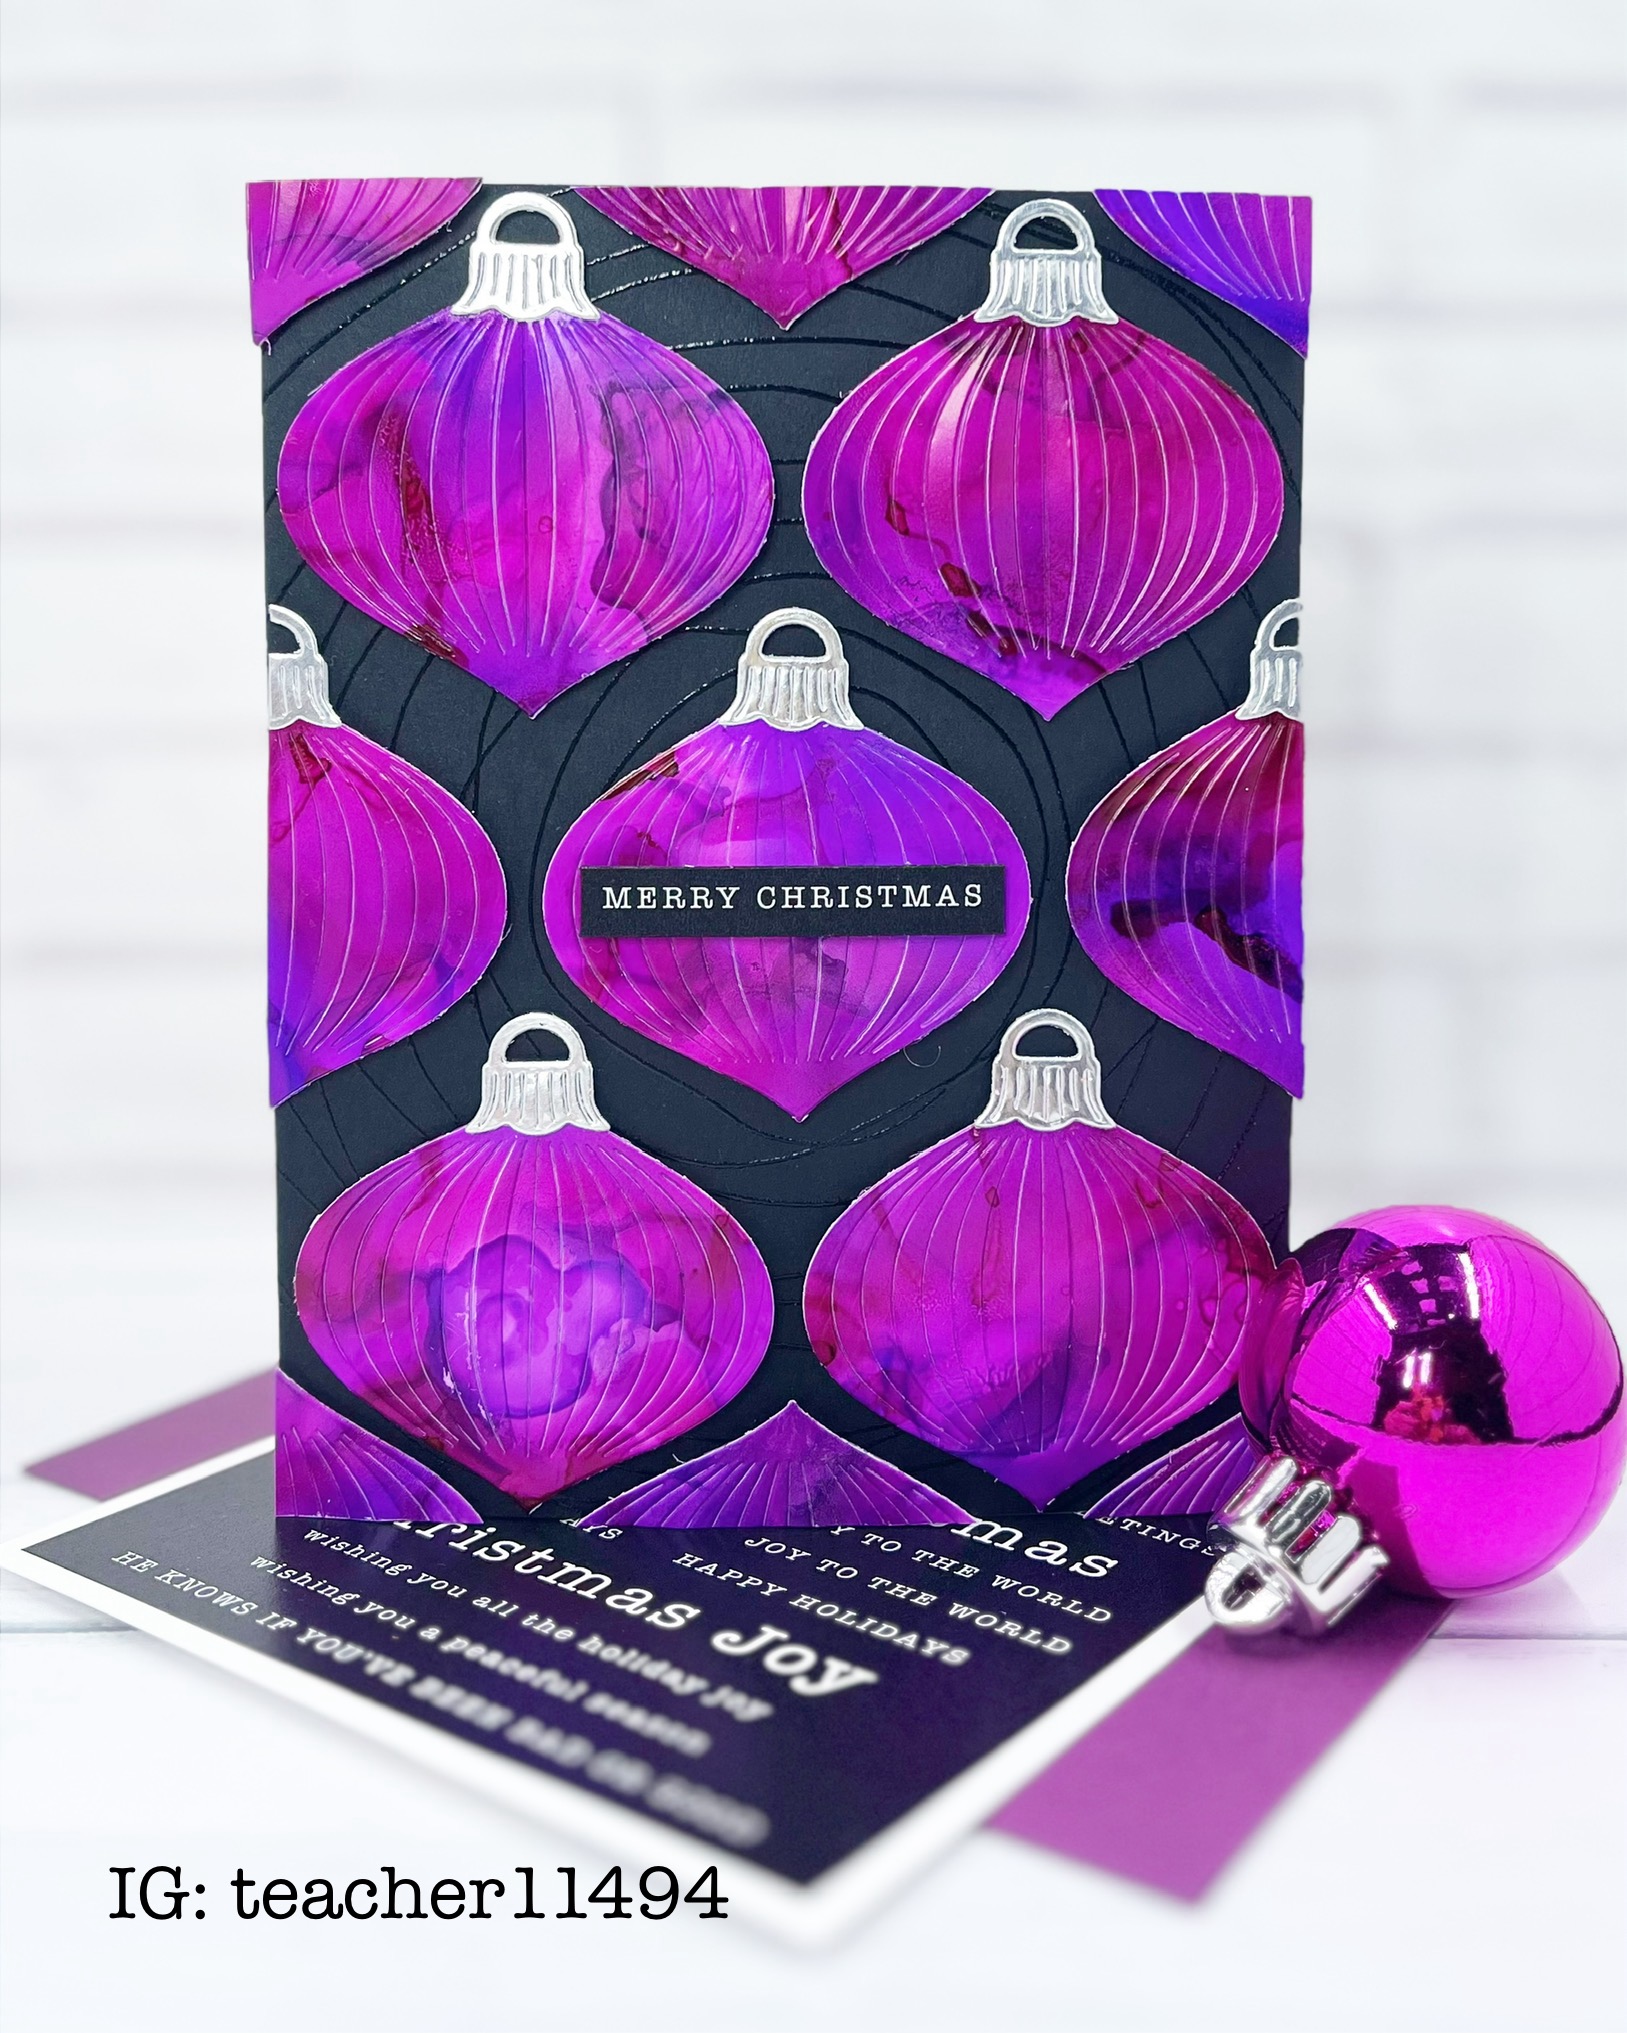
Merry Alcohol Ink Christmas!

Welcome class!
Another deep dive into my alcohol ink backgrounds stash for this pretty simple Christmas card using the new Reeded Ornament at Simon Says Stamp.  I had a full sheet of purple-pink alcohol ink which I rationed like a hiker rations food on Everest to pull this card off--LOL!  Let's get to it!


So here's the lesson plan:
1.  Pick your colors.  That pink purple alcohol ink piece drove this project, and I wanted them to stick out on the background so I went with So Very Black Cardstock from Simon Says Stamp. 
2.  Emboss the things! I didn't need to do this, but I liked the texture the Wonky Concentric Circles background stamp had on the background embossed in clear ink.  Die cut the things!  I cut the ornaments with the Reeded Ornament Die, and the tops with matte silver cardstock. 
3.  Assemble! I used a lot of foam tape on this one, and trimmed the edges of the ornaments that hung off the sides. A simple sentiment using the CZ Reverse Typed Christmas sentiments fit the bill perfectly!

Product Line Up:

Class dismissed! 
 

Monday, November 18, 2024

Use Those Scraps + Alcohol Ink Techniques

Welcome class!
Here on this Monday morning with a super, super simple card that you can make...and use up some scraps that you may have in your stash.  I don't know about you, but I have a bin in an IKEA cart next to my desk that has all sorts of too-bit-to-recycle scraps of stenciled papers, as well as my alcohol ink background stash.  See, my husband is less than a fan of the off gassing of alcohol inks (even though I don't use them in the house). When he goes out of town, I set up shop in my garage and make dozens of backgrounds and put them in the bin for when inspiration strikes to use them.  My stash is actually getting kind of small, which is why I just have this one small scrap of green to use on this card for one of my favorite techniques--embossing, then sanding!  Let's get to it!


So here's the lesson plan:
1.  Pick your colors.  Because I wanted the alcohol ink strip to do the talking, I kept the background simple white with  black sentiments. 
2.  Emboss the things!  I use the Fluted Forest Decor embossing folder from Simon Says Stamp's Festive Fun release. Sand the things!  Take a sanding block and lightly go over your embossed image so that it's lighter on the top, giving it more dimension and helping the design stick out on the embossed background. 
Die cut the things!  I used the CZ Simple Peace die with glossy black cardstock.  Emboss (more) things!  I used a sub sentiment from the Holiday Messages stamp set.
3.  Assemble!  A little foam tape and some Prism Pawsitively Dazzling Gems and it's a super simple card using some scraps (and it's a layout that is a go-to often in these parts!)

Friday, November 15, 2024

Rainbow Birthday Celebration!

Welcome class!
It's another Saturday installment of Crafty Meraki goodness!  Did you have a chance to check out their new release this week?  My card today is not a part of that new release but it's a creative use of some of their older products.  The theme for the week is celebrations, and with a 16th birthday that happened this week, I used the opportunity to make a birthday card for my niece!  The gift boxes are from the Spruce Up Layering Tree die set...those presents can be other places than under a tree!  I got to work with my Pinkfresh ink cubes and made a rainbow of the presents as I cut them all out of white cardstock and got blending. I went glam and use some of my holographic cardstock for the bows and placed it all on some Oh So Black Cardstock from Simon Says Stamp.  For the sentiment, I reached for my Gilded Greetings stamps from Crafty Meraki, which are super convenient--you can cut SOOOOOO many sentiments at one time!  I grabbed the Happy Birthday sentiment and placed it on a vellum circle.  A few sequins later and we have a card!


So here's the lesson plan:
1.  Head to the Crafty Meraki blog to see the creation of the card :)

Product Line Up:
The above products can be found HERE, which is an affiliate link to the Crafty Meraki shop.  Affiliate links just help me fund this hobby at no additional cost to you and create more lesson plans and creativity for all of you--I appreciate your support! 

Class dismissed!