Saturday, August 31, 2024

Stamptember is HERE!

Welcome class!
Happy Stamptember!  I'm happy to be participating with the Simon gang, and I have LOADS of inspiration coming this month to share with you...I've been busy!  To kick off this month's festivities, I'm combining items from Stamptember with last month's release, featuring the Sunflower Pattern stencil along with the NEW Fancy Just Because Wafer Die and Just Because Sentiment Strips. 

So here's the lesson plan:  
1.  Pick your colors.  I went with warm yellows and oranges for this card, letting the Pawsitively Saturated Inks do the heavy lifting.
2.  Stencil the things!  I used a cream base layer of cardstock, and blended some Linen Distress Ink on the edges for a distressed look.  Die cut the things!  The sentiment is out of Matte Gold cardstock, and it's going to get a HUGE workout....it's SOOOOOOO versatile! Splatter the things!  I used some gold water color to splatter gold all over my stenciled piece for dimension.
3.  Assemble!  I blended inks over the sentiment strip and got a perfectly coordinating subsentiment, and I also used those same colors to blend on the sunflower die cut using Little Sunflower Bloom wafer dies. A few gold sequins completes the look!  I love blending releases together and digging into my stash.

Product Line Up:
The above links are affiliate links, which just helps me fund this hobby at no additional cost to you and create more lesson plans and creativity for all of you--I appreciate your support!

Class dismissed!

Friday, August 30, 2024

Patterned Paper For the Win!

Welcome class!
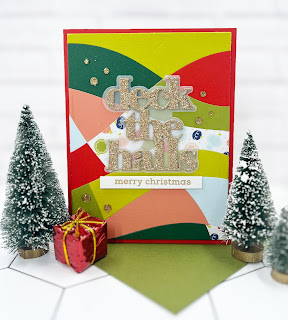
I love using patterned paper to do a lot of the heavy lifting for me when creating cards, whether it is providing a pattern or giving color suggestions.  This Concord and 9th Falala pattern paper pack did both for me with these two cards!  


So here's the lesson plan:
1.  Pick your colors.  The suggestions with the patterned paper include Lemongrass, Avocado, Evergreen, Sorbet, Powder, and Poppy.
2.  For the first card I used the Modern Mosaic card front die from Concord and 9th, and this allowed me to get 7 cards out of this experience!  For the second, I simply cut strips of different pattern papers from the same pack. 
3.  Assemble the cards!  The die cut sentiments were in different shades of glitter cardstock for each.  I accented the sentiment on the second card with my favorite holiday product, Mama Elephant's Little Santa Agenda stamps and dies...I use these all the time!


Product Line Up:
The above links are affiliate links, which just helps me fund this hobby at no additional cost to you and create more lesson plans and creativity for all of you--I appreciate your support!

Class dismissed!

Wednesday, August 28, 2024

Merry Mod Christmas

Welcome class!
I've had this card layout running through my head for months, and it was the first holiday card I made this year using the Bauhaus Blocks stencil from Uniko.  There's a lot of different visuals going on here and I love how they all came together!


So here's the lesson plan:
1.  Pick your colors.  I used Poppy, Lemongrass, Avocado and Evergreen from Concord and 9th with a splash of gold for good measure.
2.  Stencil the things!  Die cut the things!  I used the Cool Christmas Trees dies from My Favorite Things.
3. Assemble the things!  I wanted to add a little more to the card when it was done, which is why I reached for the Mama Elephant Holiday Message stamps and added a few words in Evergreen ink.

Product Line Up:
  • Concord and 9th Holiday Sayings Wafer Dies
  • I don't have affiliate links for the other products I used...I tend to get holiday products and keep them for a long time.  A quick Google search for the names of the products may find them at other vendors.
The above links are affiliate links, which just helps me fund this hobby at no additional cost to you and create more lesson plans and creativity for all of you--I appreciate your support!

Class dismissed!
Monday, August 26, 2024

Christmas in August!

Welcome class!
I finished all my holiday cards in July, but am just getting around to posting all of them now.  This card features a Stamptember set from Waffle Flower from last year's festivities called Galina's Snowflakes.  It's not available anymore buuuuuuuuut....Stamptember starts at the end of this week so who knows what amazing collabs will be up Simon Says Stamp's sleeve this year!


So here's the lesson plan:
1.  Pick your colors.  I went with a classic Kraft, white and red color scheme.
2.  Splatter your base layer.  I used Gansai Tambai watercolors for the white splatter.  Set aside to dry.
3.  Stamp the things!  I used white pigment ink with white embossing powder for all my images.  Emboss the things!  Die cut the things!
4.  Assemble!  I accessorized with red glitter drops from Taylored Expressions. 

Product Line Up:
The above links are affiliate links, which just helps me fund this hobby at no additional cost to you and create more lesson plans and creativity for all of you--I appreciate your support!

Class dismissed!

Friday, August 23, 2024

Love Me a Two for One Card!

Welcome class!
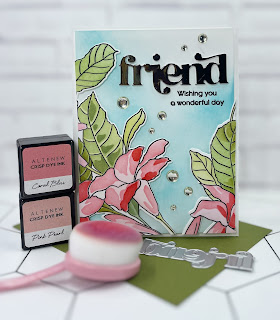
I love when I can get two cards out of one crafting session's efforts!  Altenew's Build a Garden line helps this happen easily because their floral stamps are HUGE and scream to be cut in half to make more happiness to send.  This one, Rock Trumpet, has been sitting in my stash for a LONG time and I've gone to reach for it but then find that I need to get something else done and it sits sadly in my basket of unused stamps.  Well, a few weeks ago I decided there was no time like the present so I got cracking!


So here's the lesson plan:
1.  Pick your colors.  I believe that I used Altenew's Pink Pearl, Coral Bliss, Heartbeat along with an assortment of greens (I need to start making a list of this stuff as I craft....I made these cards a while ago!).
2.  Stencil the things!  Die cut the things!  Ink blend the things!  I used a pool color to blend the background so that when I popped up the die cut floral layer it would rest on a sky background.
3.  Assemble.  Once I figured out where I was going to divide up the final rock trumpet die cut piece, I picked out my sentiments from Altenew's Timeless Sentiments set.  I stamped the sub sentiment in Versafine and embossed it with clear powder.  I couldn't find my usual Starshine Embellishments so I reached for an ancient package of Pink and Main clear drops to give the shine I was looking for. 


Product Line Up:
The above links are affiliate links, which just helps me fund this hobby at no additional cost to you and create more lesson plans and creativity for all of you--I appreciate your support!

Class dismissed!
 

Wednesday, August 21, 2024

I Hope You Smile Today!

Welcome class!
This past summer I renewed my appreciation for my Betterpress plates.  I grabbed all sorts of Betterpress goodies last summer, and didn't reach for it for months.  Then I had a blast the past few months using it in all sorts of fun ways--stencils, hot foiling, regular inks, Archival inks....you name it!  This card takes a plate and a coordinating stencil from Spellbinders out for a spin.


So here's the lesson plan:
1.  Pick your colors.  I used a palette from my Color Cube full of shades of purples and greens.  Pinkfresh inks were almost a spot-on match!
2.  Betterpress the things! I used Betterpress Porcelain paper as the the thickness and cotton fibers make the imprint super crisp.  Stencil the things! Die cut the things!  I used a sentiment from a recent Simon Says Stamp release.
3.  Assemble!  I stacked the sentiment, added some Starshine embellishments and a subsentiment after I trimmed down the panel a bit

Product Line Up:
The above links are affiliate links, which just helps me fund this hobby at no additional cost to you and create more lesson plans and creativity for all of you--I appreciate your support!

Class dismissed!

Monday, August 19, 2024

When 10 Year Olds Design Cards...

Welcome class!
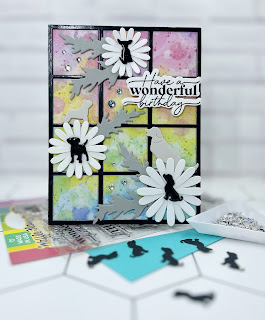
Every year when my niece's birthday rolls around, she makes requests as to what she wants on her birthday card.  This year's list was dogs, flowers, pastel colors, black and "those shiny things I like."  Challenge accepted!


So here's the lesson plan:
1.  Pick your colors.  I'm not a fan of pastel colors, so she threw me a challenge right from the start.  I got the bright idea to use patterned paper, and reached for a pad of Honey Bee Team Tie Dye, which had a sheet that fit the bill.  I think this paper pack is discontinued, but there are MANY like from a variety of manufacturers.
2.  Die cut the things!  I used the Simon Says Stamp Artwork Grid Plate and inserted the squares from the patterned paper in the windows.  I also made sure to stack the grid and have a grid of glossy black on top so it's shiny.  I reached for my favorite Waffle Flower Best Friends dies and die cut several dogs out of black and grey paper, and use the Waffle Flower Layered Daisy Dies for the flowers.
3.  Assemble!  I put a little pup in the middle of each flower and topped it with Glassy Glaze so they would stand out.  The "shiny things" are iridescent drops from Pinkfresh Studios.  A birthday sentiment from Waffle Flower completed the card.

Product Line Up:

    The above links are affiliate links, which just helps me fund this hobby at no additional cost to you and create more lesson plans and creativity for all of you--I appreciate your support!

    Class dismissed!

Thursday, August 15, 2024

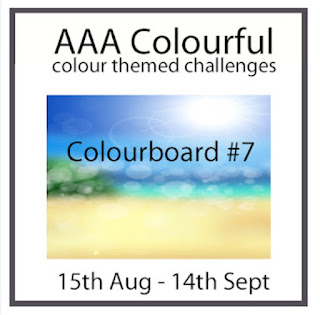
AAA Colourful Challenge #7

Welcome class!
It's time for another AAA Colourful challenge!  Such a great beach-y inspiration picture, and as usual, I took things pretty literally when I translated it to my card and was inspired by the layout too!  I reached for a new-to-me Alex Syberia Designs Expressing Gratitude set and some Pinkfresh inks and got to work!


So here's the lesson plan:
1.  Pick your colors.  It's a color challenge, so I was inspired by the vivid blue, turquoise and yellow of the inspiration photo.
2.  Stamp the things!  This is a great stamp as there's a ton of great sentiments that express thanks...and I make a lot of thank you cards.  Die cut the things!  This stamp is all one piece, so there's a special die to cut them all out perfectly. Emboss the things!  
3.  Assemble.  I ink blended on my cardstock, so I glued down the sentiments, and then blended over them one color at a time.  I only used 3 colors of cardstock, but it looks like more!  Stack those Sentiments for dimension, and add a few enamel dots.


EXTRA CREDIT!
If you're embossing using white embossing powder, get a more vivid white image by stamping with white pigment ink!  
 

Product Line Up:
The above links are affiliate links, which just helps me fund this hobby at no additional cost to you and create more lesson plans and creativity for all of you--I appreciate your support!

Class dismissed!
Wednesday, August 14, 2024

You Deserve an A+

Welcome class!
It's the last of the back to school cards!  I was inspired by a card made by Laura Bassen for this layout.  It's stereotypical to have apples for the teacher, but I love how this turned out, and hopefully my colleagues do too!

So here's the lesson plan:
1.  Pick your colors.  I wanted to have red and green apples, so I dug in my cardstock stash and found shades that I liked.
2.  Die cut the things.  A LOT of things.  I made 10 of these.  That's 40 apples.  I was at it for a while.  And don't forget the teacher sentiment either, as well as the white layer, which is cut using a panel die from The Greetery!
3.  Assemble!  Glue together the layered die cuts, stamp the sentiment (this comes from an older Altenew sentiment in my back to school stamp stash), and add in some embellishments.
Product Line Up:
The above links are affiliate links, which just helps me fund this hobby at no additional cost to you and create more lesson plans and creativity for all of you--I appreciate your support!

Class dismissed!


Monday, August 12, 2024

The Best Teacher Card

Welcome class!
Now it's time for the teacher card to take center stage!  I kept the good times rolling with Simon Says Stamp's Just Write product line.  I can't stop making cards with this, but kind of need to give some love to my other products too--LOL!


So here's the lesson plan:
1.  Pick your colors.  I wanted to have a fresh, clean feel to this.  With the traditional yellow pencils, I thought an Aqua Sky background would be a good partner.
2.  Stamp the things!  I stamped an ancient Hero Arts alphabet background on the aqua layer and set it aside, then stamped the outline pencils in a medium grey.  Stencil the things!  Got that jumbo pencil all done and accessorized it with a die cut teacher sentiment and a supporting sentiment. 
3.  Assemble the card!  Add in some of those Starshine embellishments.  I thought I lost the bag for a second and thankfully found it--phew!

Friday, August 9, 2024

A Card as Sharp as a Pencil!

Welcome class!
More of my back to school cards today:  my second batch of cards I send to the kids in the family, kids of my friends, and kids in the neighborhood.  


So here's the lesson plan:
1.  Pick your colors.  Again, I went with the rainbow.  Because that rainbow line up of pencils just makes my heart sing.
2.  Stamp the things!  I used my trusty Versafine Noir and clear embossing powder.  Stencil the things!  Die cut the things!
3.  Assemble!  I placed the pencil die cut on my top layer where I wanted it, and then flipped it over and drew a pencil mark so that I knew where to trim the jumbo pencil, as well as know where to put my foam tape.   These cards turned out so cute, but they were so simple to produce. 


Product Line Up:
The above links are affiliate links, which just helps me fund this hobby at no additional cost to you and create more lesson plans and creativity for all of you--I appreciate your support!

Class dismissed!
Thursday, August 8, 2024

A Card That's Just Write for Back to School!

Welcome class!

Not obsessed with the idea of school starting, OBSESSED with the Just Write suite of products from the Cheering for You release at Simon Says Stamp! I made 4 sets of cards—2 for staff and 2 for the kiddos in my family and neighborhood.  This is one of the sets for the kids….had sooooo much fun making a rainbow of pencils!


So here's the lesson plan:

1.  Pick your colors.  I went with a rainbow of Pawsitively Saturated Inks because I didn't want to get sick of any one color.
2.  Stamp the things!  Heat emboss the things (I used clear embossing powder over the black Versafine ink)!   Stencil the things!  Die cut the things!
3.  It stressed me out to die cut the shadow layer out of the stenciled layer but I wanted to have the sentiment inlaid into the popped up stenciled layer.  I stacked my sentiment to make it a bit more chunky.
4.  Assemble your card and enjoy!


EXTRA CREDIT!
Want to give your die cut sentiments a bit more spunk?  Use glossy black cardstock rather than regular black cardstock to give it some shine!

Product Line Up:
The above links are affiliate links, which just helps me fund this hobby at no additional cost to you and create more lesson plans and creativity for all of you--I appreciate your support!

Class dismissed!
Monday, August 5, 2024

Just a Few Just a Note Cards!

Welcome class!
I'm here with my last batch of cards I made for the Cheering for You Release over at Simon Says Stamp!  These are super simple, super basic, and super easy to reproduce in a lot of different ways depending on your color choices!


So here's the lesson plan (card 1):
1.  Pick your colors.  I went with some cool colors from the Pawsitively Saturated Ink collection over at Simon.
2.  Stamp the things!  Emboss the things (the music note is stamped in Versafine with clear embossing powder on top)!  Embellish the things!
3.  I also used the A2 Thin Frames dies for that little black edge around the stamped panel for some extra pop!


So here's the lesson plan (card 2):
1.  Pick your colors.  Another black and white card with a pop of color, this time red with the CZ Designs Just a Note die.
2.  Stamp the things!  Emboss the things!  Die cut the things!
3.  Assemble the card, include the reverse sentiment strip to go with the die cut sentiment, and then embellish with some Starshine sequins!

Product Line Up:

Friday, August 2, 2024

Coordinating Products WITHOUT the Coordinating Products!

Welcome class!
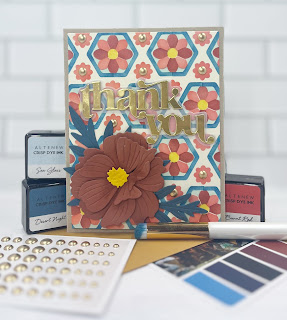
I'm back after a little break to bring you a few cards I made using the new-to-me Botanical Honeycomb stencil from Altenew but using it WITHOUT the coordinating embossing folder.  I don't emboss with folders much, mostly because I don't have very many of them, so when I bought this stencil, I figured that I could make it work with just some ink....and it did!

So here's the lesson plan:
1.  Pick your colors.  I went with a palette of warm reds and yellows from Altenew's Crisp Dye Ink line (I haven't gotten into the Fresh Inks yet since I have so many of their other ink Cubes.  The colors were inspired by a Color Cube card you can see in the pictures!
2.  Stencil the things!  I went with doing this on a piece of Buttercream cardstock from Taylored Expressions.
3.  Die cut the things!  I used the Altenew Sulfur Cosmos Build a Flower dies, and the Timeless Sentiments and Versatile Greetings for the sentiments on each.


4.  Blend the things!  Blend on your die cuts to give them some dimension.
5.  Accessorize the things!  I used matte gold embellishments from Taylored Expressions on these cards. Since the stenciled panel is larger, I got two cards for the work of one with this!

Product Line Up:
The above links are affiliate links, which just helps me fund this hobby at no additional cost to you and create more lesson plans and creativity for all of you--I appreciate your support!

Class dismissed!