Sunday, June 30, 2024

Loads of Gratitude!

Welcome class!

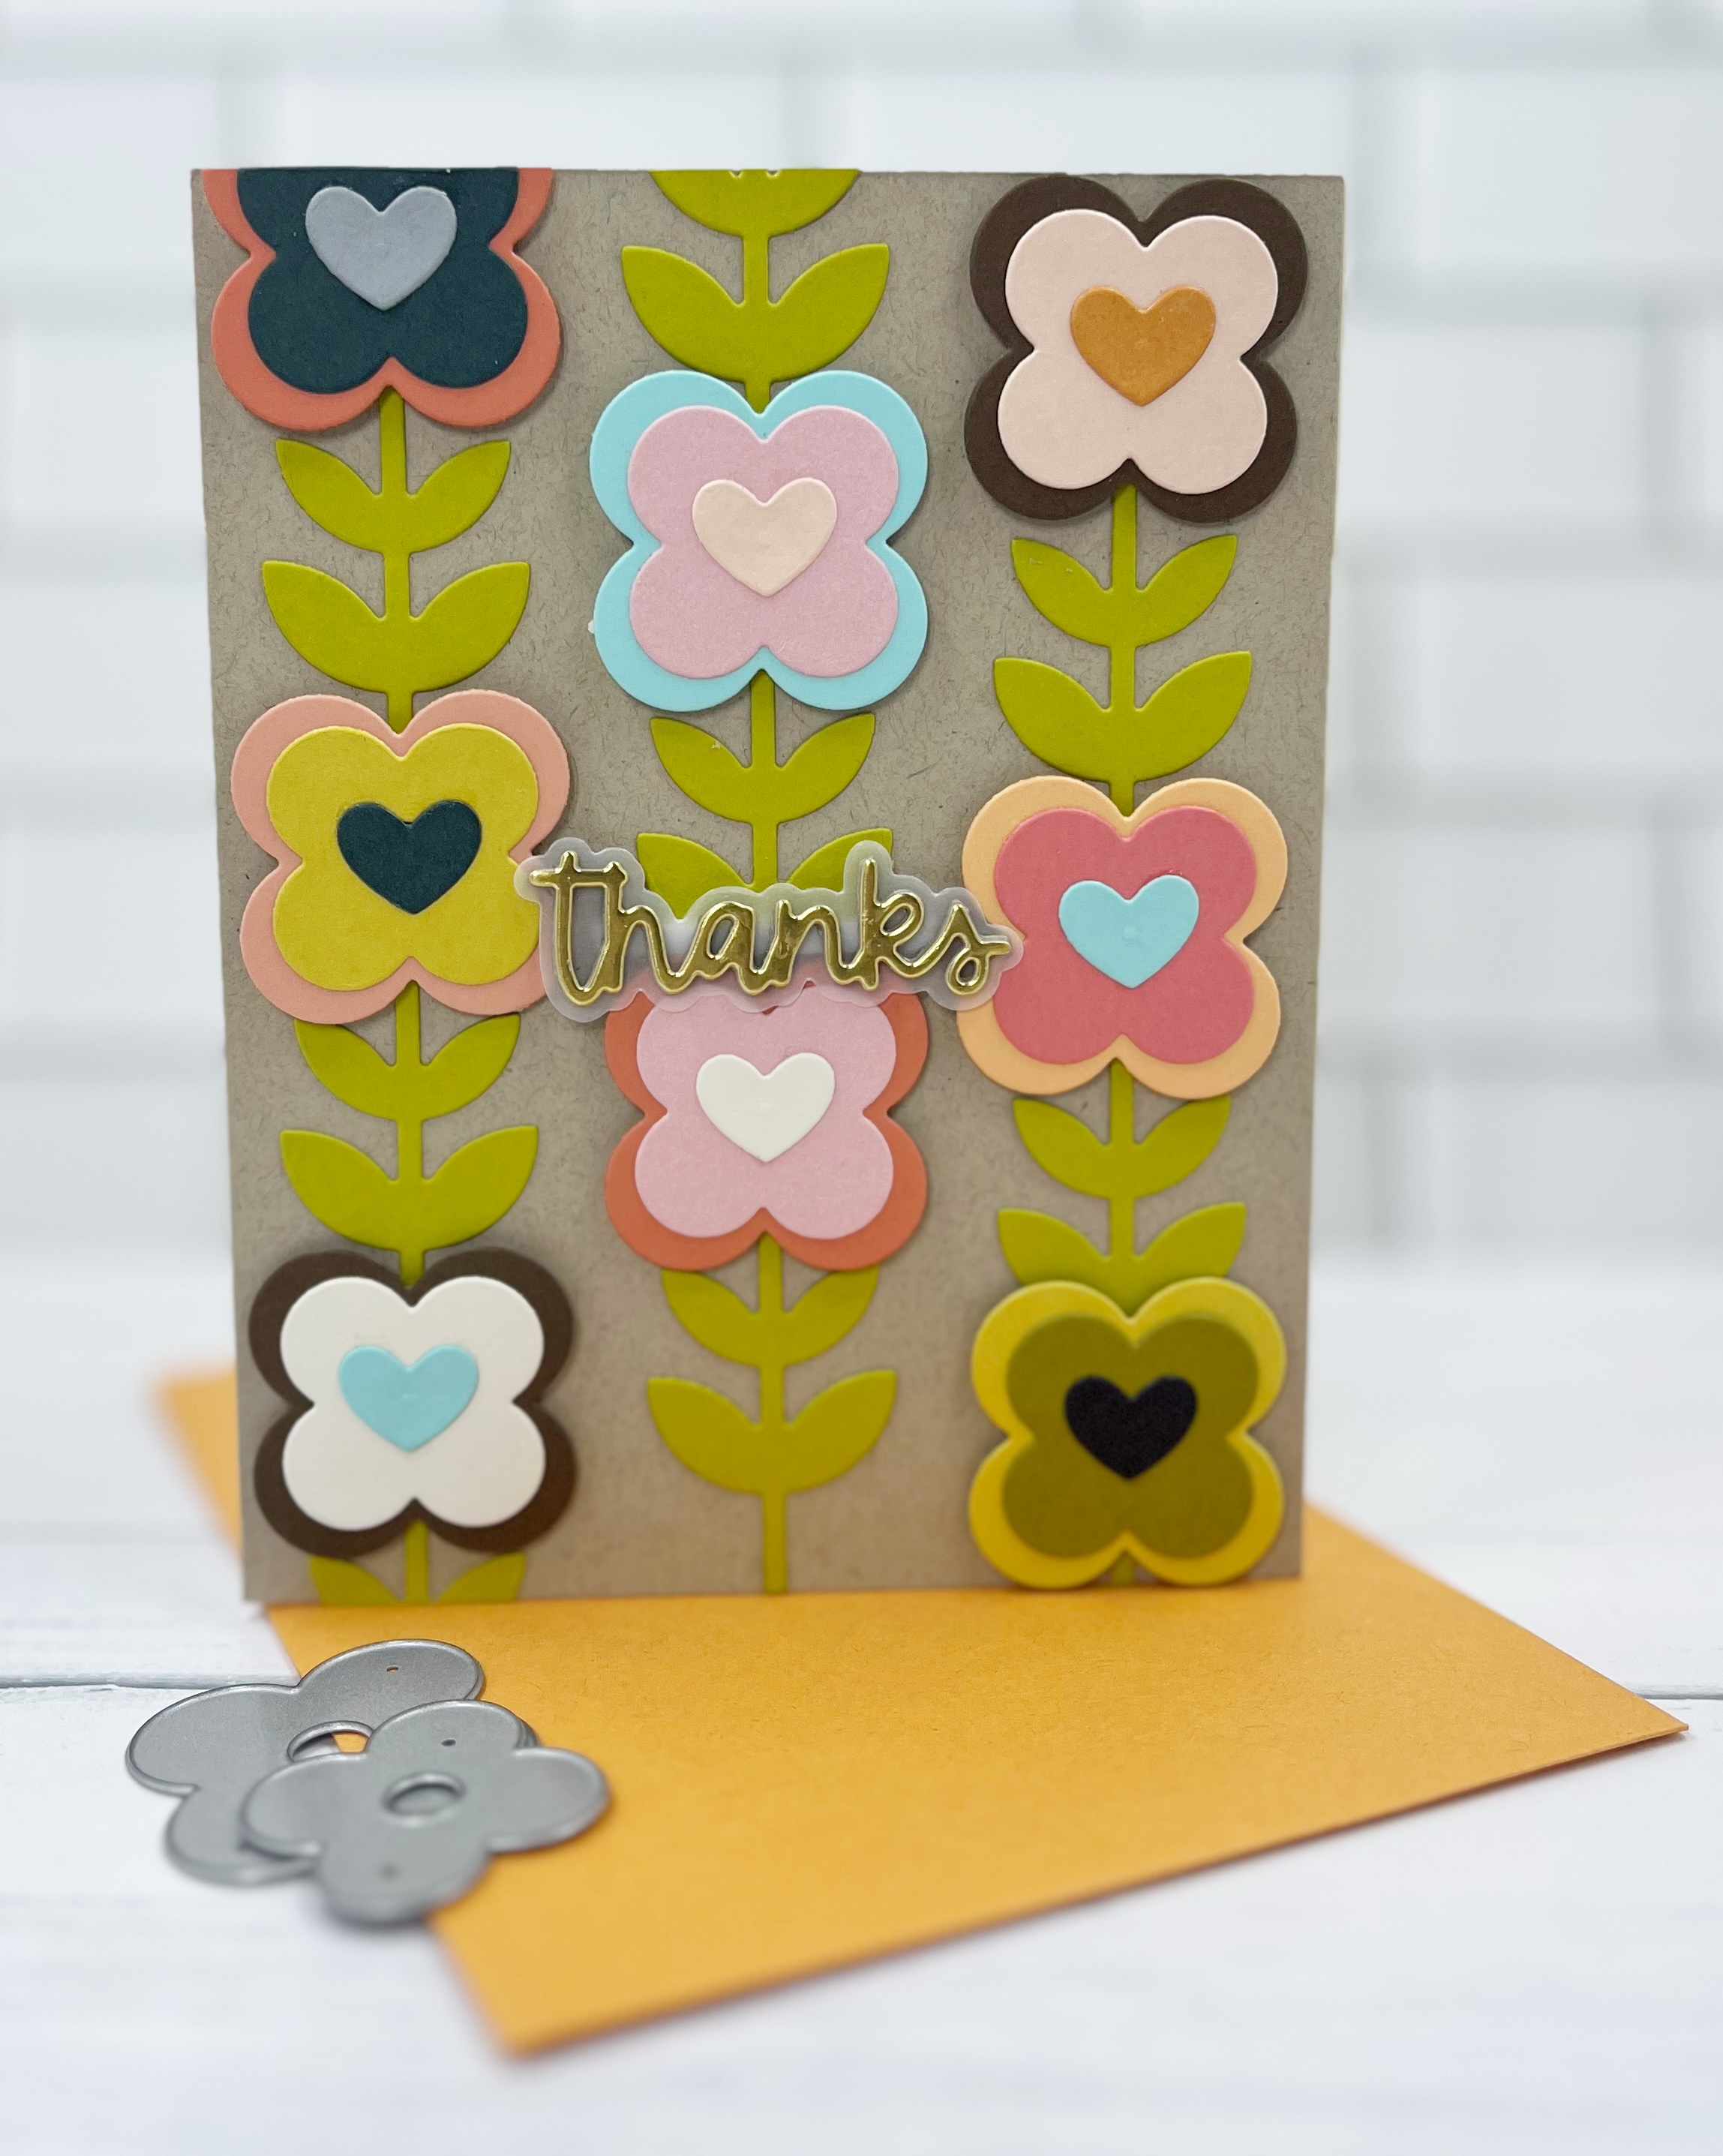
Today's cards are inspired by an artist I follow on IG (Kate Rhees).  She has the most amazing graphic art pieces and I was taken with the one shared here and needed to make some cards based on it!

So here's the lesson plan:

1.  Pick your colors.  I went all over the board with this one and used cardstock from Concord and 9th, Taylored Expressions, and The Stamp Market to come as close to matching the palette of the piece as possible.

2.  Die cut the things!  A LOT of the things!  I used the Concord and 9th Patterns and Posies die set from one of their summer camps a while back that I grabbed off a resale page.  It's a perfect match for this card!

3.  Assemble the things.  I loved making these cards as they were fun to glue together and arrange on the Kraft cardstock, which I used as a neutral background.

4.  To avoid hiding the die cutting, I just used a small sentiment from Concord and 9th's Short and Sweet die set that I grabbed on their recent sale. Ta-da!  Two more thank you cards for the stash!


EXTRA CREDIT!
I had extra flowers that I cut that couldn't go to waste, so I die cut some stems and slapped this bonus card together.  I'm loving the colors in the inspiration piece, but I'd love to do this with vibrant ones for another look!


Product Line Up:
The above links are affiliate links, which just helps me fund this hobby at no additional cost to you and create more lesson plans and creativity for all of you--I appreciate your support!

Class dismissed!

Saturday, June 29, 2024

Sending Good Vibes with the Rediscovery Hop!

Welcome class!
Today's card is a part of an Instagram card hop that encourages participants to dig into their stash to find unused goodies to create cards on a theme, or using a technique.  Boy, did I dig deep for this month!
So here's the lesson plan:
1.  Pick your colors.  Since it's a rainbow theme, I went for a traditional color palette.  I used Concord and 9th inks with my stencil in Dragonfruit, Poppy, Clementine, Buttercup, Parsley, Blueberry and Grape Soda.
2.  Stencil the things!  Stamp the things!  Emboss the things!  Die cut the things!  
3.  I turned this card on its side after being inspired by a card associated with the recent Simon Says Stamp release created by Mindy Eggen.  The embossed flowers using the Flower Power suite of products from Simon were inspired by a Carly Tee Miner card where she stamped flowers on top of a partially stenciled rainbow. 
4.  I also dug deep for my die cut and used an older one I had in the stash from SSS as well.  I die cut it a few times from regular black cardstock, then topped it off with a black glossy die cut, and layered the whole thing on vellum.
5.  Last step was to add in some of those Starshine sequins....I'm going to need more given how much I've been using them!

Product Line Up:
The above links are affiliate links, which just helps me fund this hobby at no additional cost to you and create more lesson plans and creativity for all of you--I appreciate your support!

Class dismissed!


Thursday, June 27, 2024

Happy Vibes!

Welcome class!
I have another card using the Beachcomber set from Simon Says Stamp's recent Sunny Vibes release!  It's a fun challenge for me to create different looks using the same stamp set each month, and this time I dug into my husband's workshop for supplies!
So here's the lesson plan:
1.  Pick your colors.  I went with a beachy palette using Pawsitively Saturated Inks.
2.  Emboss the things (everything is stamped in Versafine and embossed in clear embossing powder)!  Stamp the things!  Die cut the things!
3.  Get creative.  I was trying to think outside the box for sand, and instead of creating faux sand, I went downstairs in my husband's tool chest and grabbed a sheet of ultra fine sand paper to make it look realistic. 
4.  Create the ocean.  Oceans aren't all the same color, so I went for variety and dug out my Brusho watercolor powders.  If you're unfamiliar with them, they're like Lindy's Magical Powders without the shimmer built in.  I shook them on watercolor paper, and spritzed with water and let the color move around the paper, and then set it aside to dry.
5.  Assemble the card!

Wednesday, June 26, 2024

In Bloom with Gratitude

Welcome class!
I have another Spellbinders project coming your way, this time using Simon Hurley's In Bloom dies along with the Butterfly Garden Betterpress press plate collection.  
So here's the lesson plan:
1.  Pick your colors.  I wanted vibrant with this one knowing it would be on a black and white background, so I went with Concord and 9th Carnation, Sweet Pea and Dragonfruit, along with Lime Zest from Taylored Expressions.
2.  Die cut the things!  Betterpress the things!  
3. Before assembling the flowers, make sure to ink blend on them to add dimension. Then assemble the flowers.
4.  The Betterpress plate has an opening in the middle where you can put a greeting that comes with the plate.  I took a page from Jennifer McGuire's playbook and covered up that white space with the flowers.
5.  The sentiment comes from the Popular Sentiments die set from Spellbinders.  This is a layered sentiment, and I used Taylored Expression's Sticky Sheets on the cardstock so that it became self adhesive.  SO MUCH EASIER TO STICK TOGETHER.  Highly recommend.
6.  Accessorize with the random Pink and Main embellishments found in the craft room clean out.

Product Line Up:
The above links are affiliate links, which just helps me fund this hobby at no additional cost to you and create more lesson plans and creativity for all of you--I appreciate your support!

Class dismissed!
 

Monday, June 24, 2024

A Kaleidoscope of Cards

Welcome class!
In the neverending quest to use all the product that is in my unused basket, I reached for a series of Spellbinders products I got for Christmas and ended up making 4 very different cards with the same base product:  the Kaleidoscope Flowers Betterpress press plate! 

So here are the lesson plans:
CARD 1
1.  Pick your colors.  I used Pinkfresh inks for all of my cards.  This first one uses Turquoise, Pacific, Citron and Spanish Moss.
2.  I hot foiled using the Betterpress plate with silver and blended over the top.  
3.  I die cut and stamped the sentiment using the Spellbinders Stitched Kaleidoscope Arch dies and the Kaleidoscope Arch Sentiments stamps.
4.  To add a little flash, I die cut some flowers and placed silver enamel dots in the middle to go along with the silver hot foil.
CARD 2
1.  Pick your colors.  A warm palette of Pinkfresh Mimosa, Mango Sorbet and Bubble Gum this time.  
2.  Use the Betterpress plate traditionally with black ink. Take a mask and selectively blend over the background.
3.  Slap a sentiment on there using the Small Die of the Month die set from August 2022 (Outlined Sentiments).
4.  Add a few clear enamel dots that you found in your stash when cleaning up your craft room over the summer!

CARD 3
1.  Pick your colors.  Went with a cool palette using Summer Shower, Seaside, and Regal Kiss.
2.  Crop your Betterpress panel and then cut a rectangle on a tilt.  I then cut the insert panel into 4 pieces that were 1 1/8 inch wide, then popped them up with foam. Pull one of them and insert an ink blended sentiment from Fresh Picked Sentiments.
3.  Accent with some Spellbinders Prism AB Color Essential Gems.

EXTRA CREDIT!  
Didn't plan on this card but when I had one piece left over from the previous card I couldn't let it go to waste.  I was inspired by a recent card on Instagram made by Karen Downs with a simple sentiment over a blended panel.  
1.  Pick your colors.  I used Waterfall, Turquoise, Paradise and Atlantis.
2.  Blend your panel.
3.  Emboss your sentiment (this one is from Spellbinders Just Wanted to Say Sentiments).
4.  Add a few black enamel dots for fun.

Product Line Up:
The above links are affiliate links, which just helps me fund this hobby at no additional cost to you and create more lesson plans and creativity for all of you--I appreciate your support!

Class dismissed!

Saturday, June 22, 2024

She Sells Seashells….

Welcome class!
I've got more seashells coming your way from the recent Simon Says Stamp Sunny Vibes release!  Today's card takes an ombre approach to seashells and uses a cool blue palette.  

So here's the lesson plan:
1.  Pick your colors.  I went with the trio of Pawsitively Saturated Inks including Surf, Seafoam and Ocean. 
2.  Emboss your seashells in silver.  Stamp the things!  Die cut the things!
3.  Use the My Favorite Things Watercolor Wash Free Form stencil for the "pool" of water in the background.
4.  Add some silver splatter (spatter?) in the background.  I used Lindy's Magical Powders mixed with a little water so they weren't diluted too much.  
5.  A few Rainbow Splash drops and it's a card!

The above links are affiliate links, which just helps me fund this hobby at no additional cost to you and create more lesson plans and creativity for all of you--I appreciate your support!

Class dismissed!

Wednesday, June 19, 2024

Sunny Vibes Coming Your Way!

Welcome class!
I'm here today to share with you the first in a series of projects I created using the Beachcomber set that is a part of the NEW Simon Says Stamp Sunny Vibes release!
Today's project has inspiration that comes from the peach insides of shells you find on the beach.  I have a stash of alcohol ink backgrounds that I've made and this one just struck me as a solid match for this idea. I'd love to say that I remember the exact alcohol inks I used for this, but I honestly made it a year ago and have no clue...which is part of the fun of using alcohol inks...just playing around!

So here's the lesson plan:
1.  Select your color palette.  I went with the Yellow Sunsets Pawsitively Saturated Inks cube pack and used Melon, Cantaloupe and Sherbet.
2.  Emboss the seashells using Versamark ink with gold embossing powder.  Stamp all the things!  Die cut all the things!  Side note:  the layers for this stamp set line up super easy!
3.  I went with a neutral sentiment on this one using the CZ Just a Note die cut in gold matte cardstock.
4.  Assemble!

Simon Says Stamp Clear Detail Embossing Powder
Versafine Clair Nocturne (Black) Ink Pad